Papa Pump parts:
Simple and effective engineering!
1. Inlet – drive pipe
2. Free flow at waste valve
3. Outlet – delivery pipe
4. Waste valve
5. Delivery check valve
6. Pressure vessel


Optimise the location of your Papa Pump -
See how using our ‘Google Earth' survey tutorial!
Or contact us to assist you...
We are happy to assist with your site design.
Feel free to email us info@hydropulse.co.za
Or call us on +27 (0)82 857 7057
We are happy to assist with your site design.
Feel free to email us info@hydropulse.co.za
Or call us on +27 (0)82 857 7057
Easy Installation
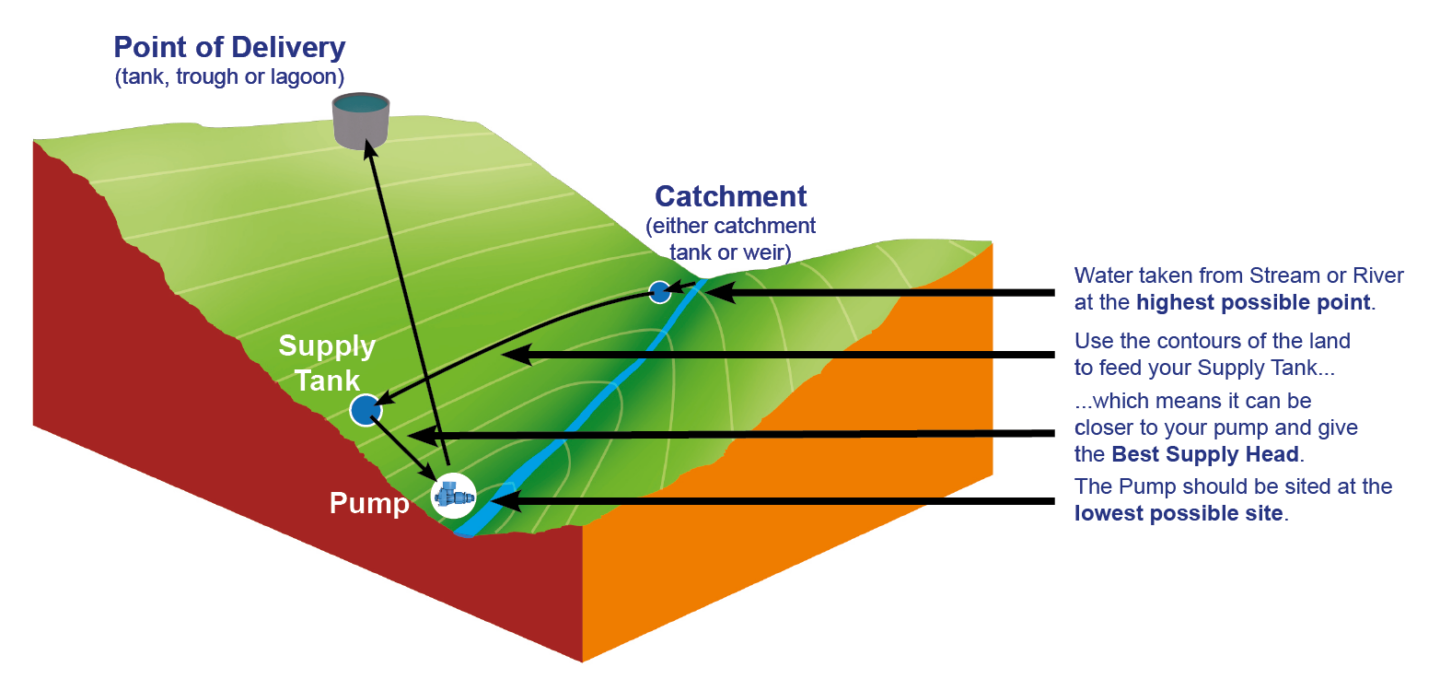
The most important aspect is to get the site set-up correct.
This will optimise your water delivery.
Typical Installation
Depending on your requirements, consideration must be given to the lay of the land. The graphic below shows a typical layout.

See how it's done
Once the pipes are in place, installation is straightforward.

How much water will I get?

This depends on a few things, and the most important is the Supply Head (i.e. the slope that lets water run into the pump).


Reading the table
Vertical axis shows the Supply head.
Horizontal axis shows the Delivery head.
The numbers show expected daily water volume at each height.
For example, a 3 meter supply head will deliver 11 232 litres a day to 15 meters high and 6 912 litres a day to 23 meters high.
BUT... I need more water than that!
Papa Pumps can be installed in parallel to ensure you get all the water that you need.
Still not sure.. drop us an e-mail.

